Sunday, November 14, 2010

Bagels

Find me a person a who does not love bagels.  You can't (unless they have a gluten or wheat allergy.)  It's like trying to beat Prince and the Revolution in a game of basketball.  There are great bagel shops in NYC, but there is nothing like a homemade bagel to start the day...or for lunch...or dinner...

Bagel dough is drier than most bread doughs, with upwards of 6 or 7 cups of flour used.  This creates the dense, chewy texture hallmarking great bagels.  Some recipes call for a very high yeast content, which result in light, airy bagels more akin to those found in the bread section of the local grocery.  However, I feel pretty strongly that a proper bagel needs to be dense and substantial.
Plain bagels. Not perfectly pretty, but delicious.

The water used for poaching the bagels before baking should be sweetened.  You can experiment with various sweeteners for different tastes, but basic sugar, malt, and molasses are the mainstays as they provide excellent flavoring and don't wind up costing so much as honey (the poaching water should have more sweetener added every few bagels, so this can wind up taking a large chunk out of the honey reserves.)

Basic Bagels


6-7 cups all-purpose flour
1 Tbsp salt
1 packet active rapid-rise yeast
2 Tbsp honey
1 Tbsp butter (very soft or melted and cooled) (substitute vegetable oil if desired)
2 1/3 cup warm water


extra oil for greasing a large bowl
4+ Tbsp  sugar or malt for poaching

Mix the flour, salt and yeast in a large bowl.  Make a well in the dry ingredients and add the water, butter/oil, and sugar.  Mix to a dough, stirring in one direction to develop the gluten.  Add water a tablespoon at a time so that the flour is completely incorporated.

Once the dough is mixed, turn it out onto a lightly floured work surface and begin kneading.  Kneading bagel dough takes time, at least a solid 10 minutes of steady work.  The dough should be dry enough that you do not need to add more flour to keep it from sticking to the surface, so add flour as needed to make a nice dry dough.  It should be very hard to work with by the time it is ready to rise.  Form a ball with the dough and put it in a lightly oiled bowl, turning the ball so that it is evenly oiled all over.

Cover the bowl and place in warm area.  Let the dough rise until doubled in size, about 90 minutes.  Punch the dough down and knead vigorously for a minute or two.  A finger indentation in the dough should not spring back immediately.

Divide the dough evenly into 14 or 15 pieces.  There are a couple ways to form the bagels: form the dough into a ball and poke a finger through it to make the hole; or form the dough into a rope, bring the ends together, and pinch.  I prefer the ball method personally, as I find that when I make pinched ropes, they tend to come undone in the poaching.

After you have formed all the bagels, give the bottoms a quick brushing of oil or place them on a well greased tray.  Let them sit, covered, for 10-20 minutes.  While the bagels are sitting, bring a pot of water to a boil and preheat the oven to 500 degrees (you'll have about 10 minutes work ahead of you before we get to the baking, so if your oven heats quickly, save the preheating until later.)

Add 2 Tbsp sugar/malt/molasses to the boiling water.  Begin poaching the bagels, 2-3 at a time, for 60-90 seconds, turning once.  The bagels will expand while being poached, so leave room in your pot to accommodate.  Take the poached bagels and place them back on a sheet of parchment paper or the greased tray.

I prefer to use a baking stone with a coating of corn meal to bake, but cookie sheets are just as effective.  Bake the bagels for 12-15 minutes, until golden-brown on top.  Transfer to a cooling rack.  Enjoy.

Bonk appétit

Thursday, October 28, 2010

Challah time!

Sweet, buttery, wonderful challah.  There's not really a lot to say.  

Bonk appétite

3 1/2 cups flour (plus extra for if needed)
2/3 cup warm water (plus extra if needed)2 whole eggs + 1 yolk
1/4 cup butter, melted
1 tsp sugar
1/4 cup honey
1 tsp salt
1 packet active yeast
1/2 tsp baking powder
1-2 Tbs vegetable oil (for coating the bowl)

Mix the flour, salt, and baking soda together in a large bowl and make a well.  Pour 1/2 cup of the warm water into the well, add yeast and sugar.  Mix thoroughly and try to incorporate as little flour as possible.  Let sit for 5-10 minutes, or until foamy.

In a small bowl whisk together the two whole eggs, butter, and honey.  When the yeast has activated, add the egg mixture to the yeast mixture in the large bowl along with the rest of the water.  Stir thoroughly and incorporate all the flour.  Add extra flour or water as necessary to get a dough that is slightly moist, but that does not stick to your hands or table top.  Knead the dough for 5-10 minutes or until indentations in the dough take several seconds to spring back.  I found that challah dough takes very little kneading, this batch only took about 5 minutes, whereas most of my other bread doughs take a good 10 minutes of kneading.  Turn the kneaded dough into a well oiled bowl, cover, and let rise in a warm place.

I have a very idiosyncratic way of handling the rising process with challah.  My friend Laurel and I made challah often the summer after I graduated from college and this rising technique was recommended by her.  Let the dough rise 3 times: first, for 30-45 minutes (a little under doubled in size) then punch down and re-knead briefly; second, again for 30-45 minutes, punch down and re-knead briefly; third, for 90+ minutes (until more than doubled in size).

After the dough has risen for a third time, turn out onto your work space, divide the dough into thirds and form the thirds into rounds.  Now is a good time to preheat the oven to 375.  Roll or press out the rounds so that they are relatively flat, then roll the flats into cylinders.  Stretch and roll the cylinders into ropes 10-12 inches long.  Let these sit for a few minutes while the oven finishes preheating.  

In a small bowl, whisk the egg yolk and some warm water together to make the wash.

Braid the ropes together.  I've read that it is best to start from the middle, working out and that 5 twists is plenty, but as you can see from the picture, my braiding advice should be taken with a very large grain of salt. Once you have the loaf formed, brush the egg wash evenly onto the loaf, making sure to cover all the twists and corners.  

Bake for 30-35 minutes or until golden brown on top.  You can try reapplying the wash to the loaf in the first 10-12 minutes of baking as the dough rises, though you might need to increase bake time depending on how quickly your oven recovers to 375.  If you are using a baking stone, make sure to use plenty of corn meal as the wash may make the loaf stick.  If you are using a baking sheet, grease it very well.


Sunday, October 24, 2010

Pizza Dough

I love pizza as much as anyone.  Maybe more.  So it only made sense to try my hand at making pizza.  I'm happy to say that it has been a successful venture marked by me berating myself for eating too much pizza in one sitting.  The dough recipe is pretty standard and can be modified by adding a 1/4-1/2 cup wine or beer, 1-2 Tbs herbs (oregano or whatever else you have lying about that is savory), or changing the flour content to include some whole wheat (though I have found that this makes for a more difficult time in stretching the dough.)

I have no doubt that my baking technique will leave practiced pizza makers aghast, but hey, I'm working without a peel and have a finicky oven.  Also, I can't seem to find the pictures documenting this venture except for one post-baked and sliced.  Will add more the next time pizza is made.

Bonk appétit!

Basic Pizza Dough

3 cups flour (a finer ground flour will give you a stretchier dough, but all-purpose works just fine.)  If you are adding wine or beer, add 1/2 cup flour per 1/4 cup liquid.
1 cup warm water
1 packet dry active yeast
1 tsp sugar/honey
1 tsp salt
2 Tbs olive oil
1/4-1/2 cup wine or beer (optional) (Again, if you are adding extra liquid to the recipe, you will need to add more flour.)

Makes 3 12 inch crusts.

Add the yeast to the warm water, mix in the sugar and 1Tbs oil and let sit for 5 minutes.  Pour the liquid (and any beer or wine you are using) into a large bowl along with half the flour.  Since I don't mix or knead with a food processor, I usually make a basic sponge and let it sit for about 10-20 minutes before working in the rest of the flour.  To do this, once you have your liquids incorporated into half the flour, stir the mixture vigorously in one direction for about 1-2 minutes.  This will develop the gluten and give the crust some springiness that I find makes it easier to work with when forming the crusts.  Alternatively, you can simply add all the liquid to all the flour and mix throughly to form the dough.  If using the sponge method, add a little bit of flour at a time after the sponge has had time to sit and incorporate to form the dough.

Aim for a dough that is slightly moist.  If your dough is crumbly, add water.  If it is sticky, add flour.  When adding extra flour or water, do so 1 Tbs at a time.

Knead the dough for 10 minutes or until it has lost a bit of its springiness.  I usually test by pushing two fingers into the dough and seeing how quickly it springs back.  I prefer my pizza dough to have more plasticity than bread dough, but not so much that it will be frustrating to form the crusts.  Form the dough into a ball.  Once you are done kneading, coat a large bowl with the remaining oil and turn the dough in the bowl, covering it evenly with oil.  Cover the bowl and let the dough rise in a warm place for 1-2 hours.

You can punch down the dough and let it have a second rise, or form the crusts after a single rise.  Form the dough into a cylinder and cut into 3 equal pieces (if you added extra liquid and flour, you may find that the recipe is better suited to making 4 10inch crusts.)  Cover the pieces and let sit for about 10 minutes.  This short rise usually makes the dough easier to work with.  Pre-heat the oven to 500 degrees.

Roll, pull, or toss the dough to shape.  work on a lightly floured surface so that you may easily transfer the dough to a peel or sheet and then into the oven.  Aim for a crust that is about 1/8 thick.  Even thickness is the goal.  Lightly oil the formed crust, transfer it to a peel or sheet, top and toss it in the oven for 12-15 minutes.

Notes on baking


A hotter oven gives you a nice, crisp crust, but you may find that the pizza is a bit squishy in the middle depending on what your toppings are.  Since I don't have a pizza peel, I've found that transferring a fully topped pizza to the oven results in me cursing a lot and winding up with burns.  So, I sometimes will bake the crust on its own for 5-7 minutes at a lower temperature (450), take it out of the oven, top and then bake at 500 for 5-7 minutes.  I'll report back on how things work when I get my peel.

White/Flax loaf


Bread bread bread

Recently, I've been basking in the joys and smells of bread baking at home.  I'm still learning the ins and outs of amateur bread making, but so far all of the loaves have been tasty (though not always pretty.)  I think a lot of this has to do with my unpredictable Brooklyn apartment oven: runs hotter or colder depending on the alignment of the planets, not incredibly well insulated so heat recovery time is a little weak, etc. etc.

So what I thought I'd do is write a little about my kneading and raising techniques, post a basic recipe or two that I use and then give the rest over to pictures add pictures in later posts.  Comments, critiques, tricks are all welcome.

Starting and Kneading

When I start a loaf, I've been doing one of too things: I either add the activated yeast and water to 1 cup of flour and stir it vigorously for about a minute to develop the gluten, let this sponge rise for about 30 mins, and then add the rest of the flour and knead.  The other way I start a loaf is simply adding the yeast and water to the flour, give it a thorough mixing and a quick knead, let it rise for a few minutes and then get on with the kneading.  

These are both techniques I have read about, though I really have no idea how they affect the final product.  Thoughts?

As far as kneading goes, I'm a fan of working with a moist dough and adding flour throughout the kneading until I have a dough ball that is still slightly moist, but doesn't stick to the work surface or my hands.  I knead for about 10 minutes or until I can push a couple of fingers into the dough and it not spring back immediately.  

Kneading goes thus: flatten the dough with my left hand, stretch the dough with my right (just stretching, no tearing), pull back the dough, quarter turn, repeat.  When the ball has the right amount of springiness, I form a sphere with the dough and work it into a quasi-round shape (great description, I know.)  Basically, I pull the dough with my thumbs and work the dough to the bottom of the ball and knead it back into the center.

Then I let it sit for a couple of hours, covered in a lightly oiled bowl, until the dough has doubled.  Punch the dough down and knead again for a few minutes.  I turn it back into the bowl and let it rise a second time.  

Baking

A few weeks ago I decided that it was time to invest in a baking stone.  I don't regret it.  Worth every penny.  

When I bake bread, it is usually a basic loaf and I start it at 450 degrees and may or may not lower the temperature depending on how the loaf looks after 10 minutes.  

I've tried a couple of different baking techniques to get different crusts.  Our oven is not huge and we don't have a large steaming pot, so I haven't yet tried a simulated steam bake.  But I have put a pan of water in the back of the oven to increase the overall humidity.  I also tried spraying the loaf with water every couple of minutes for the first 20 minutes.  As I understand it, a more humid oven simulates a wood burning oven and gives you a crustier loaf.  Again, thoughts, suggestions, tips are always welcome.

Dough Cutting

I've read a lot about cutting the top of a loaf before baking to give the bread room to expand.  This certainly seems to work, though I always wind up with weird alien head loaves rather than a nice round.  Any tips?

Recipes

Basic White
3.5 cups all purpose or baking flour, plus extra for kneading
1 Tbs butter, softened
1.33 cups warm water
1 packet active yeast
1 tsp sugar
1 tsp salt

Basic White with flax
Same as above, but substitute .5 cup flax meal for .5 cup flour.

Basic Whole Wheat
Same as above, but substituting some whole wheat flour for the all-purpose.  The more whole wheat that is used, the denser the loaf will be and possibly will require longer baking times.

Thursday, September 16, 2010

Cake time

Patient Girlfriend's birthday was yesterday, and what is a birthday without cake?  One of our favorite bakeries in Brooklyn made a cake months and months ago that Patient Girlfriend has been talking about ever since: moist yellow cake, vanilla butter cream frosting, raspberry filling, topped with coconut.  One of the things I love most about One Girl Cookies is that their cake stands on its own.  It is not just a vehicle for the frosting as is the case with so many cakes.

Mine turned out a fair shade less attractive than a One Girl Cake largely in part due to the thin consistency of my frosting.  Other than that, I, and Patient Girlfriend, were very very happy with the cake.


Sponge Cake


1 cup very soft butter (2 sticks)
1 1/3 cup self-rising flour
2 Tbsp corn starch
1 tsp vanilla extract
4 large eggs
3/4 cup sugar
3 Tbsp milk


2 8 inch round cake pans, at least 2 inches deep


Pre-heat the oven to 350.  In a large bowl, cream the butter and sugar.  Add the vanilla.  Add one egg at a time, with a bit of flour between each egg.  Add the rest of the flour and cornstarch and incorporate well.  Add a bit of  the milk slowly until the batter is very slightly runny (not easy to pour, but drops nicely off a wood spoon.)

Line the cake pans with parchment paper and grease or butter the sides.  Pour equal portions of the batter into each pan.  Bake for 25 minutes or until the tops are gold and the edges have begun to pull away from the pan.

Remove from oven and let cool 10 minutes before turning out the cakes.  Let stand until cool.


Filling


Raspberry preserves (reduced sugar if possible)
Shredded coconut

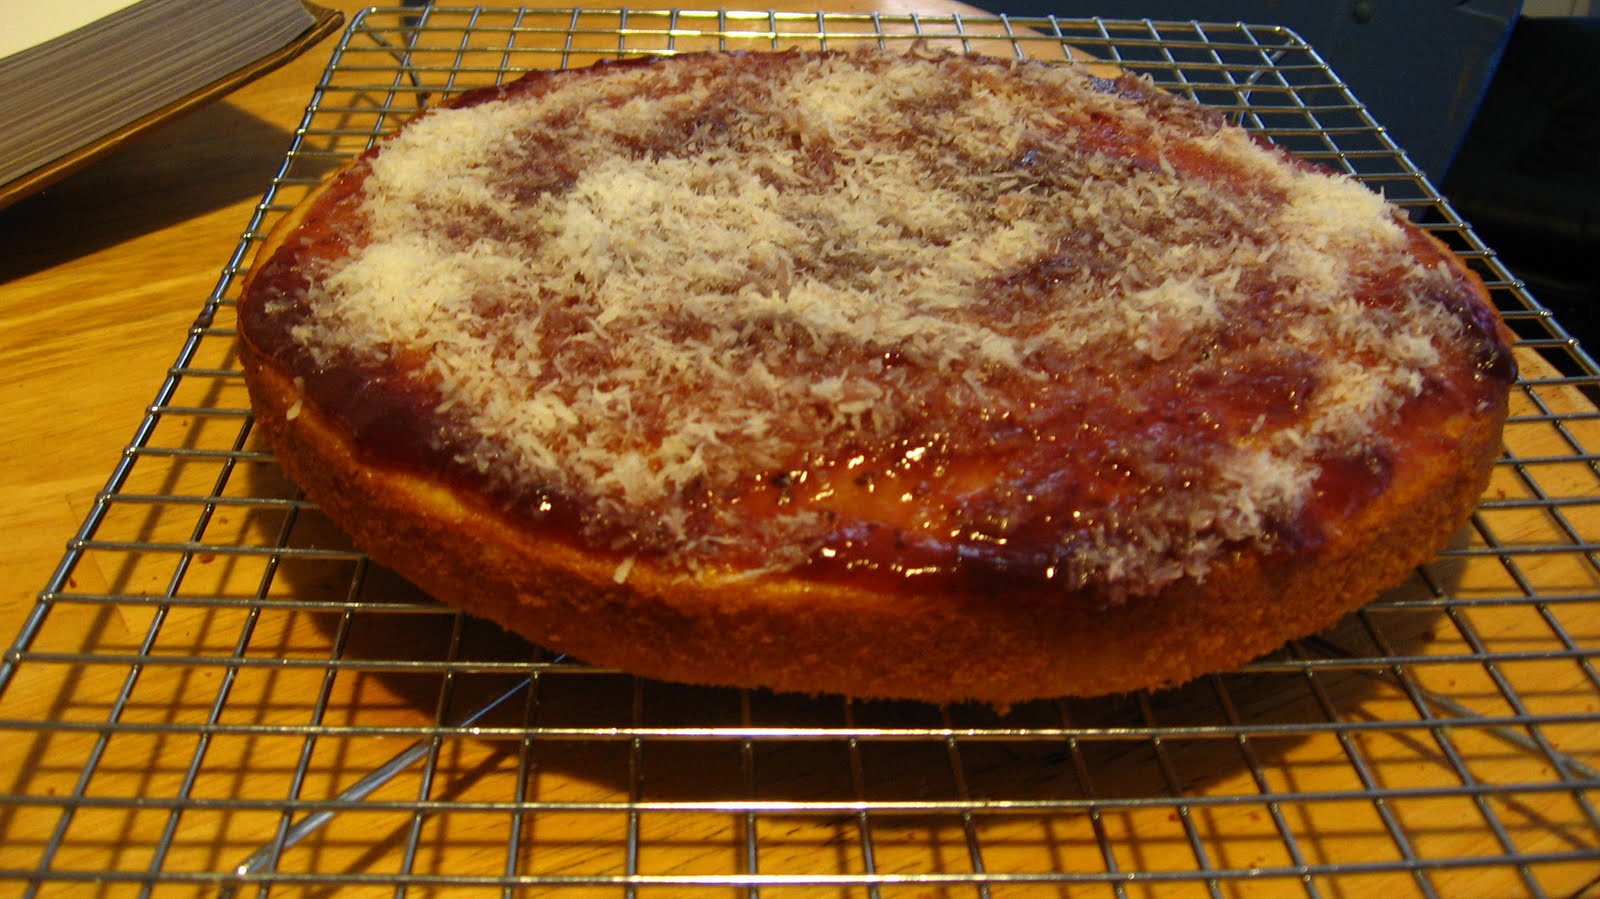
The filling is simple: spread enough preserves on the top of each cake to thinly cover the entire cake.  Sprinkle with coconut.  Done.

Carefully stack the cakes, topped sides facing each other.

Buttercream frosting 
1/2 cup very soft butter (1 stick)
3 cups confectioner's sugar
1 tsp vanilla extract 
1/3 cup milk

Cream the butter in a large bowl.  Add and combine the sugar, vanilla, milk.  Beat until smooth and firm.

Now to be honest, cake decorating is not something I have practiced extensively (as is evident by the pictures.)  This frosting spread well along the top of the cake, but was too runny to cover the sides cleanly.  Any suggestions?

Toppings


1 small pomegranate, seeded
6 oz. fresh raspberries.

Cover the sides and top with pomegranate seeds, decorate the top with the raspberries.

 So it didn't turn out to be the prettiest thing I have ever made, though it is a lot prettier than some of the things that have come out of my kitchen.  The cake was delicious.  The frosting was sweet, but not sickeningly so, and most importantly, it did not overpower the flavor of the cake.  Hope you enjoy.

Bonk appétit!

Lime gelato...goes fut :(

I finally made a batch that was perfectly smooth, creamy and wonderful.  Too bad I ruined it with too much lime zest and not enough sugar...

On the plus side, I have an idea now of what I need to do to consistently make ice cream batches that come out with the consistency and texture I've been looking for.  Will update next week after some experimenting.